Orienteering for Kids: Navigate Your Way to a Fun Outdoor Family Adventure
Over the weekend, my kids and I completed our very first orienteering course at an event for beginners to advanced orienteers set up by the local orienteering club.
I’d come upon the website for the Quantico Orienteering Club (our local club) a few months ago. I finally pulled the trigger and signed up for the event on Sunday.
I watched a YouTube video on the basics of orienteering, but honestly I had no idea what to expect. I knew I liked to be outdoors, so I thought this seemed like a natural activity.
My son had purchased an orienteering compass in February, so we piled into the car (with the compass, of course) and were on our way to Lake Needwood in Maryland.
Orienteering Basics
For those who know little to nothing about this outdoor sport, I’ll share the orienteering basics. Honestly, it’s a great way to get kids outside.
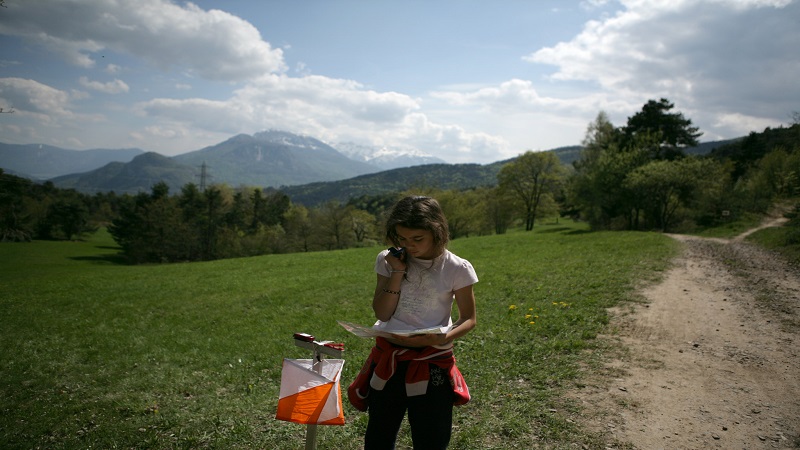
Orienteering is like a scavenger hunt in which you hunt for neon-colored checkpoints called “controls” using a paper map and compass. It’s great for all fitness levels, too.
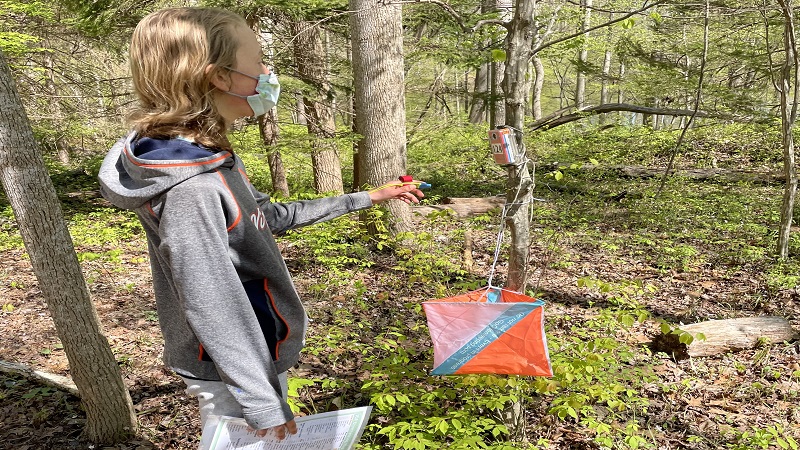
At each checkpoint, you punch a control box with a handheld e-punch device that tracks the controls you successfully reach and at what time since it’s a timed event.
There are different orienteering course levels that are color-coded. Courses range from white (very easy) to blue (most advanced). There are many levels in between.
Orienteering courses are located in wooded areas, like state and local parks. Controls can be found alongside a trail or deep in a forested section.
Control locations are ordered and marked on the paper map. An orienteering compass helps you to quickly find the precise location so you can e-punch each control.
It was honestly really fun and a great way to make hiking a little more exciting for kids who are generally hiking-averse (like mine can be at times).
Choosing an Orienteering Course
When you find and sign up for an orienteering event, you will need to choose a course to complete. As I noted above, white is very easy and for absolute beginners.
White courses are short, no more than 2-3 km. The course we completed at Lake Needwood was 2.3 km. It was also entirely on-trail. A compass was hardly required.
On the map, paths and roads are indicated by symbols, as are uncrossable rivers and impassable cliffs. Yikes. Thankfully, the latter two features were not on our course.
We had an orienteering compass, but really, since all the checkpoints were on-trail, we hardly used it at all. From time to time, I would use the compass on my iPhone.
From here, the next orienteering course is the yellow course. It’s for the beginner who has completed one course. Yellow is a good orienteering course for kids, too.
The yellow course is also one that may not require much use of a compass. However, once you get to orange – for the immediate orienteer – a compass is a must-have.
Anything above orange is for advanced orienteers, including brown, green, red and blue. These courses range from 3.5 km to 10 km and have more challenging terrain.
The Orienteering Event
Once you have selected an event and course, you will choose a time slot for your family orienteering. This keeps the course from getting crowded.
Show up at the orienteering event in the designated time window and check in at the registration desk. You will receive a topographic map and e-punch.
If you’re brand new, many orienteering events will offer a course and activity overview for beginners. They’ll let you know where to start and then you’re set to go.
Once you arrive at the starting point (marked by a triangle on the map), you will e-punch “clear,” then “check,” then “start.” Then, navigate to the first control.
Seek out each control in the order they appear on the map. On the white course, we had to find eight controls, but on a blue course, there may be many more.
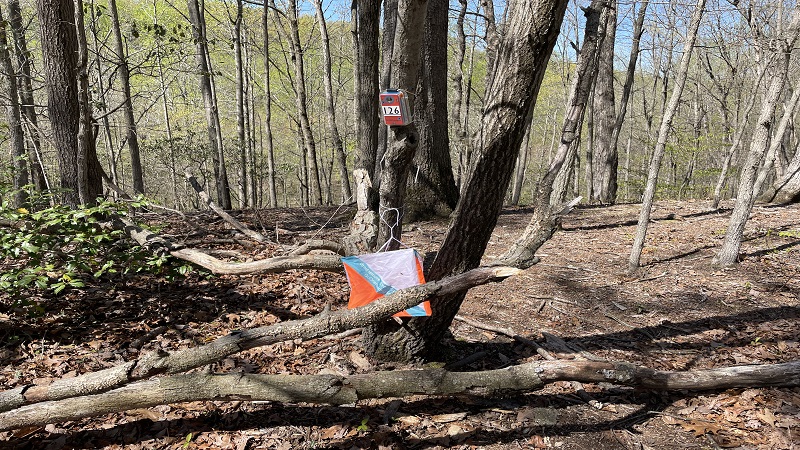
Once you reach each checkpoint, which is marked by a brightly-colored flag or box, you will e-punch the box. Before you do, double-check to make sure it’s the right one.
Orienteering courses of various levels may overlap. So, the number on the control may differ from what you see on the map.
For example, our first checkpoint was #120. This control is shared, so on another level course, this control could actually be the sixth checkpoint.
Our last checkpoint was marked by a double circle. This was actually the finish checkpoint, so there were eight controls plus the finish checkpoint.
Once you finish, return your e-punch to the registration desk. You’ll then receive what looks like a receipt with your punch time at each control and total time.
On our course map, there was a QR code we could scan for results. Out of 19 teams, we came in 6th. That’s not bad for our first time orienteering. We will be back.
Top Tips: Orienteering for Kids
It’s a good idea to get your bearings before any family activity, including orienteering. Here are a few tips and advice to get you and your children off on the right foot:
#1: Watch an Orientation Video.
Get oriented to orienteering. There are lots of short videos on orienteering for beginners to help you get started before you tackle a simple orienteering course.
It’s good to read up on orienteering, but it’s even more helpful to see the sport in action so you really know what to expect when you arrive at the orienteering event.
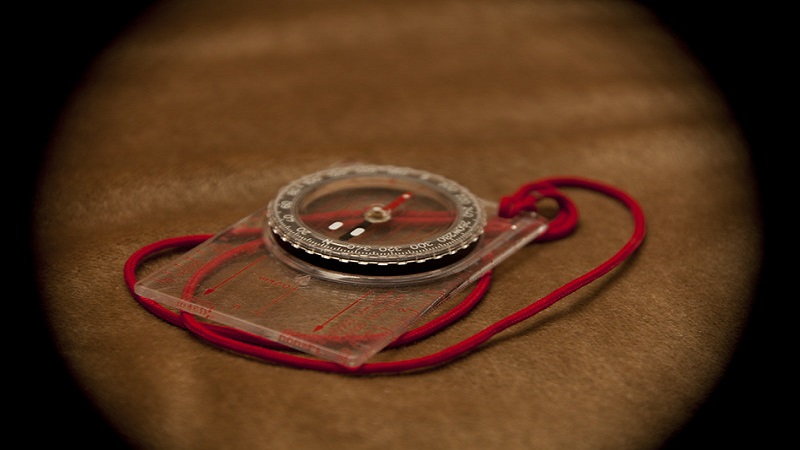
#2: Secure an Orienteering Compass.
Consider purchasing an orienteering compass with a lanyard that you can line up on your course map. Line up the needle with north on the topographic map.
Alternatively, for beginner courses, you can use the compass on your iPhone. Either way, your navigation skills will be flexed as you traverse the orienteering course.
#3: Hone Your Compass Skills.
Properly using a compass to navigate is a valuable skill. Thankfully, there are a variety of compass orienteering games that can make it easy to learn this skill.
Among compass games for kids, the simplest are compass tag and compass relay.
#4: Study a Topographical Map.
Well, maybe not study, but certainly take a look at a topographical map before you begin. This simple orienteering map will help you to establish your bearings once you arrive.
On the back of our map, there were loads of standard orienteering map symbols that took us a few minutes to review. If you can, review these symbols before you arrive.
Honestly, once you review the top tips, engage in a few orienteering activities for beginners and complete your first orienteering course, you’ll be well on your way.
Now that we’ve completed a white course, we are already eager to go back to tackle a slightly more challenging yellow course. We will be experts before too long.